Understanding Opalescence Whitening Trays
Achieving a brighter, more confident smile is within reach with Opalescence whitening trays. This guide provides comprehensive directions for using these popular and effective teeth whitening products. Opalescence trays are designed to be used at home, offering a convenient and affordable alternative to in-office whitening treatments. By following these directions carefully, you can safely and effectively brighten your teeth, revealing a more radiant smile. This guide will walk you through everything you need to know, from understanding what Opalescence trays are to the step-by-step process of using them and maintaining your results.
What are Opalescence Whitening Trays?
Opalescence whitening trays are custom-fitted trays used to apply a professional-strength whitening gel to your teeth. Unlike over-the-counter whitening strips or toothpastes, Opalescence uses a potent bleaching agent, usually carbamide peroxide or hydrogen peroxide, to penetrate the enamel and break down stains. The trays themselves are typically made by your dentist, ensuring a precise fit that maximizes the gel’s contact with your teeth while minimizing gum irritation. This custom fit is crucial for effective whitening and comfortable wear. The gel is applied inside the trays, which are then worn for a specific amount of time each day, as directed by your dentist, to gradually lighten the shade of your teeth.
Benefits of Using Opalescence Trays
Opalescence whitening trays offer several advantages over other teeth whitening methods. One significant benefit is the effectiveness of the professional-strength whitening gel, which is designed to deliver noticeable results. The custom-fit trays ensure the gel is applied evenly and stays in contact with the teeth, maximizing the whitening effect. Moreover, using Opalescence trays at home is significantly more convenient and more affordable than in-office whitening treatments. You can whiten your teeth on your own schedule, fitting it into your daily routine. The process is also generally comfortable and less sensitive than some other whitening options. These trays often provide long-lasting results, especially when combined with good oral hygiene practices and routine dental check-ups.
Getting Started with Opalescence Trays
Before you begin using Opalescence whitening trays, it’s essential to prepare properly. This involves a consultation with your dentist and gathering the necessary supplies. This initial preparation is key to ensuring a safe, effective, and comfortable whitening experience. Always follow your dentist’s specific instructions, as they will tailor the treatment to your individual needs and oral health. This preparation phase sets the stage for successful whitening, helping you achieve the smile you desire.
Consulting Your Dentist
The first step is always consulting your dentist. They will assess your overall oral health to determine if you are a good candidate for whitening and discuss the best treatment options. Your dentist will examine your teeth and gums to identify any potential issues, such as cavities, gum disease, or existing dental work, that might affect the whitening process. They may also take impressions of your teeth to create custom-fitted trays. Your dentist can also advise on the appropriate concentration of whitening gel and the recommended wear time based on your specific needs and desired results. This initial consultation is vital to ensure the safety and effectiveness of the whitening treatment.
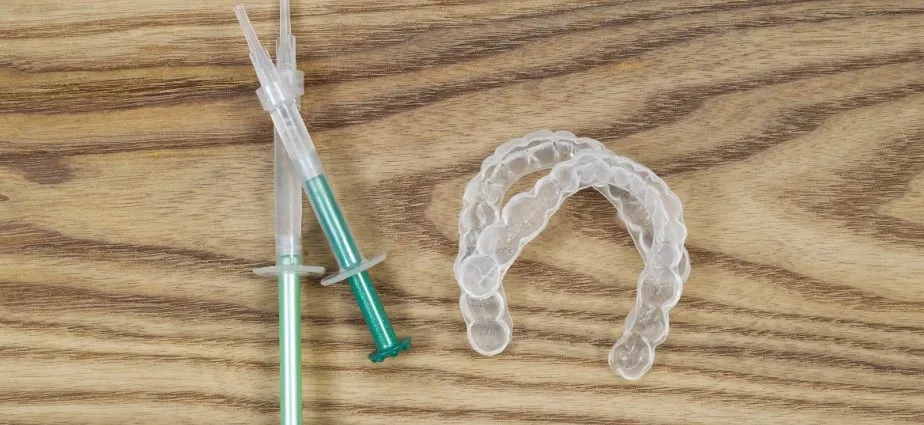
Gathering Your Supplies

Once your dentist approves the treatment, you’ll need a few essential supplies. This typically includes the custom-fitted Opalescence whitening trays, the whitening gel (usually in a syringe), and a toothbrush. You might also want a soft-bristled toothbrush for cleaning your trays and teeth, and a mirror to help with the application. Ensure you have all the necessary supplies before starting the process. Your dentist will provide the whitening gel and trays, and they may recommend specific products to use during the whitening process to minimize any potential sensitivity.
Step-by-Step Directions for Opalescence Whitening Trays
Follow these step-by-step directions to use your Opalescence whitening trays effectively. Proper technique ensures the best whitening results while minimizing potential side effects. Consistent use according to these instructions will help you achieve a brighter, whiter smile. Always refer to your dentist’s specific instructions for personalized guidance.
Preparing the Trays
Before applying the gel, make sure your teeth are clean. Brush and floss your teeth gently to remove any plaque or debris. Rinse your mouth with water. Dry your trays thoroughly before applying the gel. This will ensure the gel adheres effectively. This step is important to remove any food particles that could block the gel from reaching the teeth and to ensure that the gel is evenly distributed.
Applying the Whitening Gel

Carefully squeeze a small bead of Opalescence whitening gel into the tray along the front of each tooth impression. Use only the amount of gel recommended by your dentist, usually about half or one-third of the way up the facial surface of the tray, to avoid excess gel overflowing. Ensure that the gel covers all the teeth you wish to whiten. Be careful not to overfill the trays, as excess gel can irritate your gums. The gel should be applied evenly across the surface of each tooth to ensure consistent whitening.
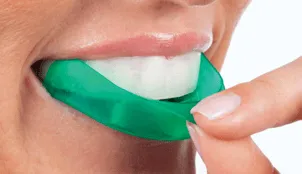
Inserting the Trays
Gently insert the trays into your mouth, making sure they fit snugly over your teeth. Seat the trays firmly against your teeth, ensuring the gel makes contact with the tooth surfaces. Use your fingers to gently press the trays to ensure they are fully seated against your teeth. Any excess gel that oozes out can be wiped away with a clean tissue or cotton swab. This step ensures the gel is evenly distributed and effectively whitens your teeth. Ensure the trays are in place and comfortable.
Wear Time and Duration
The wear time and duration depend on the concentration of the whitening gel and your dentist’s recommendations. Typically, you’ll wear the trays for a specific amount of time each day, often ranging from 30 minutes to several hours, or overnight. Follow your dentist’s instructions closely. Be consistent with the treatment schedule to achieve the best results. The duration of treatment can vary from a few days to a few weeks, depending on the initial shade of your teeth and the desired level of whitening. Do not exceed the recommended wear time to avoid increased sensitivity or other potential side effects.
Removing and Cleaning the Trays

After the recommended wear time, remove the trays and rinse your mouth thoroughly with water. Brush your teeth gently to remove any residual gel. Clean the trays by rinsing them with cool water and gently brushing them with a soft toothbrush. Avoid using hot water, as this can warp the trays. Store your trays in their protective case to prevent damage. Proper cleaning and storage are essential to prevent bacterial buildup and ensure the trays’ longevity.
Important Tips for Optimal Results
To maximize your whitening results, follow these important tips. These guidelines will help you achieve and maintain a brighter smile. Paying close attention to these points will enhance your overall whitening experience and the longevity of your new, brighter smile.
Avoiding Food and Drinks
During the whitening process, avoid foods and drinks that can stain your teeth, such as coffee, tea, red wine, and dark-colored berries. These items can reduce the effectiveness of the whitening treatment and potentially stain your teeth. If you consume any staining foods or beverages, rinse your mouth with water immediately. Consider using a straw for drinks to minimize contact with your teeth. Following these precautions will help protect your teeth from discoloration and maintain your whitening results.
Managing Sensitivity

Some people experience tooth sensitivity during the whitening process. If you experience sensitivity, your dentist may recommend using a toothpaste designed for sensitive teeth. You can also reduce the wear time or frequency of the treatments, as advised by your dentist. Avoid extremely hot or cold foods and drinks. If the sensitivity is severe, consult your dentist. These steps will help to manage and alleviate any discomfort, allowing you to continue with your whitening treatment more comfortably.
Maintaining Your White Smile
Once you’ve achieved your desired level of whitening, it’s important to maintain your results. This involves good oral hygiene practices and occasional touch-up treatments. Maintaining your bright, white smile requires ongoing attention to prevent staining and preserve your results. These methods will ensure long-term satisfaction with your whitening treatment.
Following Up with Your Dentist
Regular check-ups with your dentist are essential to monitor your oral health and discuss any concerns or questions you may have about your whitening treatment. Your dentist can provide professional cleanings to remove surface stains and assess the overall condition of your teeth. They can also advise on touch-up treatments if needed to maintain your desired level of whiteness. Consistent dental care ensures that you can keep your smile bright and healthy.