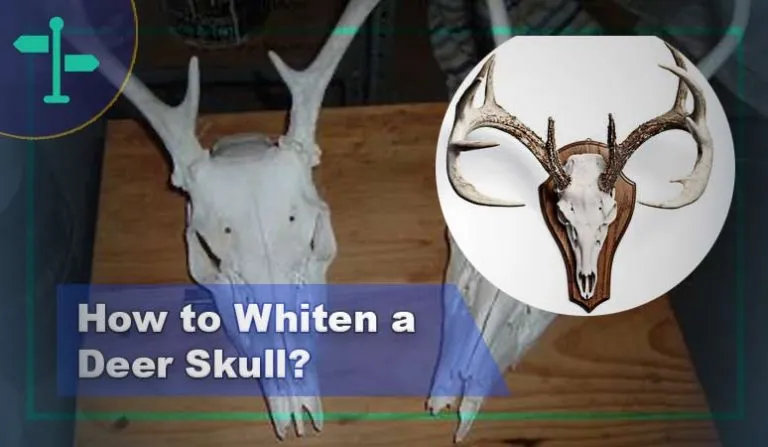
What is Deer Skull Whitening
Deer skull whitening is the process of cleaning and bleaching a deer skull to achieve a pristine, white appearance. This practice is popular among hunters, taxidermists, and anyone who appreciates the beauty of natural artifacts. The goal is to remove all organic matter and discoloration, revealing the clean bone beneath. This not only enhances the aesthetic appeal of the skull but also helps preserve it for a longer duration. Whitening a deer skull is a rewarding project that can transform a trophy into a stunning display piece. It requires patience, attention to detail, and a basic understanding of the methods involved. The outcome is a visually striking piece that showcases the natural beauty of the deer skull.
Why Whiten a Deer Skull
There are several reasons why individuals choose to whiten a deer skull. Primarily, it is done for aesthetic purposes. A clean, white skull is far more visually appealing than one that is stained or discolored. Additionally, whitening helps to preserve the skull. Removing organic material and bleaching the bone can prevent further deterioration. The process can also highlight the intricate details of the skull. This process often showcases the natural beauty and form of the skull, making it an attractive display piece. Whether it’s for display or preservation, whitening enhances the value and appearance of the skull.
Aesthetic Appeal of a Whitened Skull

The transformation from a weathered, often brownish skull to a bright, clean white one is remarkable. The contrast between the bone and the surrounding environment is striking, drawing attention to the skull’s natural form and detail. A whitened skull can be a beautiful centerpiece in a home, cabin, or office, and it serves as a conversation starter. The process enhances the beauty of the skull, turning a once-hidden treasure into a proudly displayed object. Whitening allows you to showcase your hunting trophy or a found skull with pride, displaying the intricate details.
Preservation of a Whitened Skull
Whitening plays a crucial role in preserving the skull. By eliminating all organic matter, such as dried tissues and fats, you are reducing the risk of bacterial growth and decay. The whitening process will also remove any lingering organic compounds that could cause discoloration over time. This proactive step enhances the skull’s lifespan, ensuring it remains in good condition for years to come. Properly whitened and maintained skulls can last for generations, making it a worthy investment of time and effort.
Essential Tools and Materials for Deer Skull Whitening
Gathering Your Supplies

Before you begin, gather the necessary materials. You’ll need a large pot or container to boil the skull, a degreasing agent (such as Dawn dish soap or ammonia), a whitening agent (hydrogen peroxide is common), and various tools. These tools include a sharp knife or scalpel for removing any remaining tissue, wire brushes for cleaning, and protective gloves and eyewear. It’s also essential to have a well-ventilated workspace, as some of the chemicals can produce strong fumes. A sturdy work surface is beneficial, providing a stable environment for cleaning and whitening.
The Importance of Protective Gear
Safety should be your top priority during this process. Always wear protective gloves to prevent skin contact with chemicals and boiling water. Eye protection is crucial to avoid splashes, and it is recommended that you work in a well-ventilated area. Consider wearing a respirator mask, particularly when working with strong chemicals like hydrogen peroxide. Proper ventilation and protective gear prevent health hazards and make the whitening process safer and more enjoyable. By taking these precautions, you protect your health and ensure that you can enjoy the process from start to finish.
Step-by-Step Guide to Whitening a Deer Skull
Initial Preparation

The first step is to remove as much tissue and flesh from the skull as possible. This can be done by boiling the skull in water for a few hours, allowing the meat to loosen. This method may cause the skull to fall apart if boiled for too long. Once the meat is loose, use a knife or scalpel to carefully remove it. Be mindful of the delicate parts of the skull, such as the nasal cavity and antlers. Carefully remove any remaining meat, taking your time to avoid damaging the bone structure. Thorough preparation will make the rest of the process much easier and more effective.
Cleaning the Skull
After removing the flesh, the skull needs thorough cleaning. This involves removing any remaining tissue and debris. Use a wire brush or a similar tool to scrub the surface of the skull, paying close attention to the crevices and hard-to-reach areas. Multiple cleaning passes may be necessary. Ensure that the skull is completely free of any organic material to achieve a pristine finish. Rinse the skull thoroughly with water after scrubbing. Be sure to remove any lingering remnants to prepare the skull for degreasing and whitening.
Degreasing the Skull
Degreasing is a crucial step in the whitening process. Place the cleaned skull in a container with a degreasing agent. This could be a solution of warm water and Dawn dish soap or a diluted ammonia solution. Allow the skull to soak for several days, changing the solution every day. Degreasing removes any remaining fats and oils that can cause discoloration and hinder the whitening process. The duration of the degreasing process will depend on the skull’s condition and can take up to a week. After degreasing, rinse the skull thoroughly with clean water.
Whitening the Skull

Methods for Whitening
There are several methods to whiten a deer skull, the most popular being the use of hydrogen peroxide. The choice of method will depend on your preferences and available resources. Each method involves the use of a whitening agent that oxidizes the bone, removing stains and discoloration. The key is to choose a method that is effective and doesn’t damage the bone. Always follow the manufacturer’s instructions and take appropriate safety precautions. The following methods are common and provide effective solutions for achieving a bright white finish.
Hydrogen Peroxide Method
The hydrogen peroxide method is one of the most common and effective ways to whiten a deer skull. Immerse the degreased skull in a solution of 3% to 12% hydrogen peroxide. You can use a bowl or container large enough to submerge the entire skull. Ensure the skull is fully submerged. The skull should soak for several hours or up to a few days. The time will depend on the concentration of the peroxide and the desired level of whiteness. The goal is to achieve a bright white appearance. Once whitened, rinse the skull thoroughly with clean water.
Borax Method

Borax can also be used to whiten a deer skull, although it is less common than hydrogen peroxide. Prepare a solution of borax and water. Soak the skull in the borax solution for several hours or overnight. Borax has a milder effect than hydrogen peroxide. This method may require multiple applications to achieve the desired result. Rinse the skull thoroughly with water after the borax treatment is complete. Borax is a less harsh alternative for those who want a gentler whitening approach.
Post-Whitening Care and Maintenance
Drying and Sealing the Skull
After whitening, allow the skull to dry completely in a shaded area, away from direct sunlight. Direct sunlight can cause discoloration. Once dried, you may apply a sealant to protect the bone from environmental factors. A clear acrylic sealant works well and can help to preserve the skull for years. The sealant protects the skull from dust, moisture, and other potential damage. Proper drying and sealing will maintain the pristine appearance of the skull. Careful drying and sealing will ensure your whitened skull retains its beauty for a long time.
Long-Term Preservation Tips

To preserve your whitened deer skull, keep it away from direct sunlight and extreme temperatures. Handle the skull with clean hands to avoid transferring oils and dirt. Dust the skull regularly and inspect it for any signs of damage or discoloration. Proper storage and care will extend the lifespan of your whitened skull. If displaying the skull, consider using a display case or shelf to protect it from dust and accidental damage. These precautions can help keep your skull looking its best for years to come.
Common Mistakes to Avoid
Damage from Improper Cleaning
One of the most common mistakes is using harsh chemicals or aggressive scrubbing methods during the cleaning process. These methods can damage the delicate bone structure. Always use gentle methods and tools. Take your time during the cleaning process, and avoid applying excessive pressure or abrasive materials. It’s better to repeat the cleaning process several times than risk damaging the skull. Prioritize gentle cleaning techniques to maintain the integrity of the skull.
Over-Bleaching

Over-bleaching is also a common mistake. Leaving the skull in the whitening solution for too long can damage the bone, making it brittle or causing it to crumble. Follow the manufacturer’s recommendations. Keep a close eye on the skull’s progress. If the skull begins to appear too white or shows signs of damage, remove it from the solution immediately. A little patience and careful monitoring will help you avoid over-bleaching. Keep the skull in the solution for the correct amount of time to achieve desired results.
Displaying Your Whitened Deer Skull
Displaying a whitened deer skull is a rewarding way to showcase your achievement. There are numerous ways to display a whitened skull, depending on your personal preferences. You can mount it on a plaque, hang it on a wall, or display it on a shelf. Consider the style of your home decor when choosing a display method. A well-displayed skull can become a focal point in any room, adding a touch of rustic elegance. The display you choose should be both aesthetically pleasing and functional, protecting the skull and allowing it to shine.