What is Facetune and Why Use It for Teeth Whitening
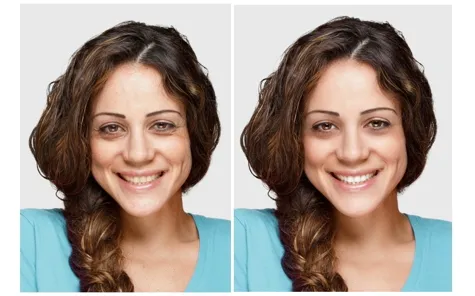
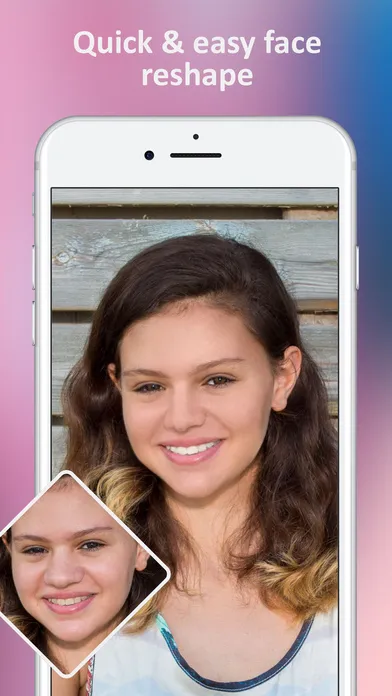
Facetune is a powerful photo editing app designed for smartphones, especially iPhones, that allows users to enhance their selfies and portraits. While it offers a range of features from smoothing skin to reshaping facial features, one of its most popular capabilities is teeth whitening. People turn to Facetune for teeth whitening because it provides a convenient, accessible, and often more affordable alternative to professional dental procedures. The app lets users quickly and easily adjust the appearance of their teeth in photos, perfect for social media posts, profile pictures, or simply improving self-confidence. This accessibility makes Facetune a go-to choice for those seeking a brighter smile without the time and cost associated with professional treatments. The ability to instantly see results and make adjustments also adds to its appeal.
Understanding Facetune’s Teeth Whitening Features
Facetune offers several tools that contribute to teeth whitening, giving users a high degree of control over the final result. Understanding these tools is key to achieving natural-looking results. The main features include the ‘Whiten’ tool, which directly targets the teeth and allows users to brighten them, and tools for adjusting brightness and contrast, as well as the details feature. These features work in conjunction to help you achieve the perfect smile. Using these tools requires a balance to ensure the result looks authentic. A deep dive into these functions will help users understand how to best utilize them for optimum results.
The ‘Whiten’ Tool Explained

The ‘Whiten’ tool is the primary feature used for teeth whitening in Facetune. It typically works by allowing you to select the teeth and then apply a brightening effect. The app offers an adjustable slider or intensity level, giving you the ability to control how much whitening is applied. However, it’s crucial to use this tool with moderation. Overuse can lead to an unnatural, overly bright appearance that gives away the fact that the photo has been edited. The tool’s effectiveness depends on the quality of the original photo and the angle and lighting. Careful and gradual adjustments are always recommended to achieve the best outcomes. Experimenting with the slider and comparing before-and-after results helps users fine-tune their approach and achieve a natural look.
Adjusting Brightness and Contrast
Beyond the dedicated ‘Whiten’ tool, adjusting brightness and contrast plays a significant role in enhancing the appearance of teeth. Brightness controls the overall light levels in the photo, while contrast adjusts the difference between light and dark areas. By subtly increasing the brightness, you can make the teeth appear slightly whiter. However, be careful not to overdo it, as this can wash out other details in the image. Fine-tuning contrast can also make teeth appear more vibrant by emphasizing the difference between the teeth and the surrounding gums and shadows. A slight increase in contrast can create a more defined and polished smile. A balance must be found to ensure the teeth look natural and not artificially altered, these settings work best in conjunction with the whitening tool.
The ‘Details’ Feature and Teeth Whitening
The ‘Details’ feature in Facetune focuses on enhancing the sharpness and clarity of textures, which can be subtly applied to teeth to make them look cleaner and brighter. This feature doesn’t directly whiten teeth but can improve their overall appearance by reducing the prominence of minor imperfections or stains. By carefully increasing the details, you can give the teeth a more polished look. Too much detail, however, can make the teeth appear artificial, so moderation is key. This tool works best in conjunction with the whitening tool and can be used to give the impression of a professional dental cleaning. The precise application and careful adjustment of this feature can greatly contribute to a natural-looking smile.
5 iPhone Teeth Whitening Secrets Using Facetune

Secret 1 Using the Whiten Tool Effectively
The first secret is to master the ‘Whiten’ tool by applying it gradually. Start with a very subtle adjustment and slowly increase the intensity until you achieve the desired effect. Always compare the results with the original photo to ensure the teeth look natural and not overly bright. Focusing on the overall brightness in relation to the rest of the image is also essential. Pay close attention to the shadows and highlights already present in the picture. Using a conservative approach will help you avoid creating an artificial look, while still achieving a noticeable improvement in the brightness of your smile.
Secret 2: Subtle Brightening with Contrast
The second secret is to use the contrast tool subtly. Increase the contrast slightly to make the teeth pop without dramatically changing their color. This technique works best when combined with a conservative use of the ‘Whiten’ tool. By enhancing the contrast, you create a visual separation between the teeth and the surrounding areas of the mouth, making the teeth appear brighter naturally. Remember that the goal is to enhance, not transform. Overdoing the contrast can lead to an unnatural and artificial result. This requires a delicate balance between improvement and maintaining a realistic appearance.
Secret 3: The Details Feature for Natural Results
The third secret involves using the ‘Details’ feature cautiously. Applying a small amount of detail can enhance the texture of the teeth, making them look cleaner and more refined. Be careful not to overdo this, as too much detail can make the teeth appear fake. Focus on achieving a subtle enhancement that improves the overall look without altering the natural appearance of the teeth. Fine-tune the detail level so that it complements the whitening and contrast adjustments. This approach ensures the final result is realistic, providing a polished and natural-looking smile. A balanced application of these tools helps avoid the common pitfalls of over-editing.
Secret 4: Avoiding Over-Whitening
The fourth secret is to avoid over-whitening. A common mistake is making the teeth appear brighter than the surrounding environment. Ensure the teeth’s brightness aligns with the overall lighting of the image. This means that if the picture is taken in low light, the teeth should not be stark white. Adjust the whitening in small increments and regularly compare it to the original. Pay attention to how the teeth look relative to the skin tone and other elements of the photo. Over-whitening often results in a very artificial look. The goal is to create a natural enhancement that complements the rest of the face. Maintaining a balance is essential to a polished, believable result.
Secret 5: Combining Tools for Perfection
The fifth secret is to master the art of combining different tools for the best results. Use the ‘Whiten’ tool for the main whitening effect, the contrast feature for enhancing definition, and the ‘Details’ tool for a polished look. Before applying any tool, make sure the photo is of good quality, and the lighting is favorable. Always review your changes and adjust each tool’s settings until you achieve a balanced, natural appearance. The key to perfect teeth whitening in Facetune is a mix of careful planning, subtle enhancements, and attention to detail. The proper application of these combined techniques creates the best possible results.
Tips for Natural-Looking Teeth Whitening

Choosing the Right Photo
The quality of the original photo significantly impacts the final result of teeth whitening. Choose photos with good lighting, as it helps reveal the natural color of your teeth. Avoid photos with harsh shadows or uneven lighting, as these can make it challenging to apply the whitening effect evenly. A photo taken in natural light, such as near a window or outdoors, is usually best because it provides a more accurate representation of your teeth’s color. A well-lit image makes it easier to assess and improve the appearance of your smile without creating an unnatural look. Consider the angle and composition of the shot, ensuring that your teeth are clearly visible and in focus.
The Importance of a Natural Smile
Maintaining a natural-looking smile is a critical aspect of effective teeth whitening in Facetune. Aim to enhance your smile subtly, rather than completely changing it. Avoid making the teeth too bright or altering their shape excessively. It’s about improving what you already have, not creating something entirely new. Focus on refining the natural contours and color of your teeth to appear cleaner and brighter. Subtle enhancements preserve the authenticity of your smile, ensuring that the results look realistic. Strive for a balanced and harmonious look that complements your face, rather than drawing unwanted attention to the teeth.
Common Mistakes to Avoid

Several common mistakes can ruin the effect of teeth whitening in Facetune. Over-whitening is a significant issue, leading to an unnatural and artificial appearance. Overuse of the ‘Whiten’ tool and ignoring the surrounding lighting conditions are typical culprits. Another mistake is neglecting the rest of the image, such as adjusting brightness and contrast throughout the photo. Also, applying excessive detail can make the teeth look fake. Avoiding these pitfalls involves applying a conservative approach and making adjustments in small increments. Regularly comparing the edited image to the original can help you catch mistakes and make sure you are maintaining a natural look. Practice and patience are the keys to achieving the best results.
Conclusion
Facetune offers a convenient way to enhance your smile, but it is important to use its features wisely. By mastering the secrets of gradual adjustment, the use of multiple tools, and avoiding common mistakes, you can achieve a natural-looking teeth whitening effect on your iPhone. Remember that subtle enhancements often lead to the best results, and always strive to maintain a balanced and realistic appearance. With practice and a mindful approach, you can use Facetune to boost your confidence and achieve a brighter, more attractive smile.